

Installation guide
Allow about fifteen minutes, without a single line of code. Follow the steps in order: each one ends with what you should see before moving on. If you get stuck, write to us at contact@getstend.com.
The screenshots on this page show the dashboard in French; in English, the dashboard shows the same cards with English labels.
Before you start
You need access to the Shopify admin that allows installing apps: the store owner account, or a staff account allowed to manage apps and themes. Also have this information ready, you'll enter it in step 4:
- your customer service email address: it receives the cases sent by the assistant (returns, packages not received, damaged items, unanswered questions);
- your return window, in days after delivery;
- your return instructions: return address, who pays for shipping, expected condition of the items;
- your FAQ: shipping, payment, sizes, contact… A simple copy and paste of your FAQ page is enough;
- your contact page address, if it isn't the default Shopify one.
Step 1: install the app
- Open Stend's page on the Shopify App Store (or the installation link we sent you) and click Install. Open Stend's page on the App Store
- Shopify shows the list of requested access: orders, products, discount codes, store policies, returns and shipping rates. They let the assistant read your orders and act when a customer asks. Accept.
What you should see: Stend opens in your Shopify admin, on the Overview tab. You'll find it later in Shopify's Apps menu. The dashboard is shown in the language of your Shopify admin; you can switch between English and French at any time with the FR / EN menu at the top.
Step 2: choose your plan
In the Overview tab, the Choose your plan card:
- Choose the plan. Prices and what each plan includes are on the home page. Every plan includes all of customer service.
- Set Extra conversations allowed each month. At 0, the assistant stops when your plan's quota is reached. Above 0, extra conversations are billed per block of 100, up to the number you choose.
- Tick the boxes to accept the terms of sale and the data processing agreement, and to confirm that your store's target audience is not mainly children under 13.
- Click Continue in Shopify. Shopify shows you the price and the cap, which you approve there. The subscription starts with a 14-day free trial, then appears on your usual Shopify invoice.
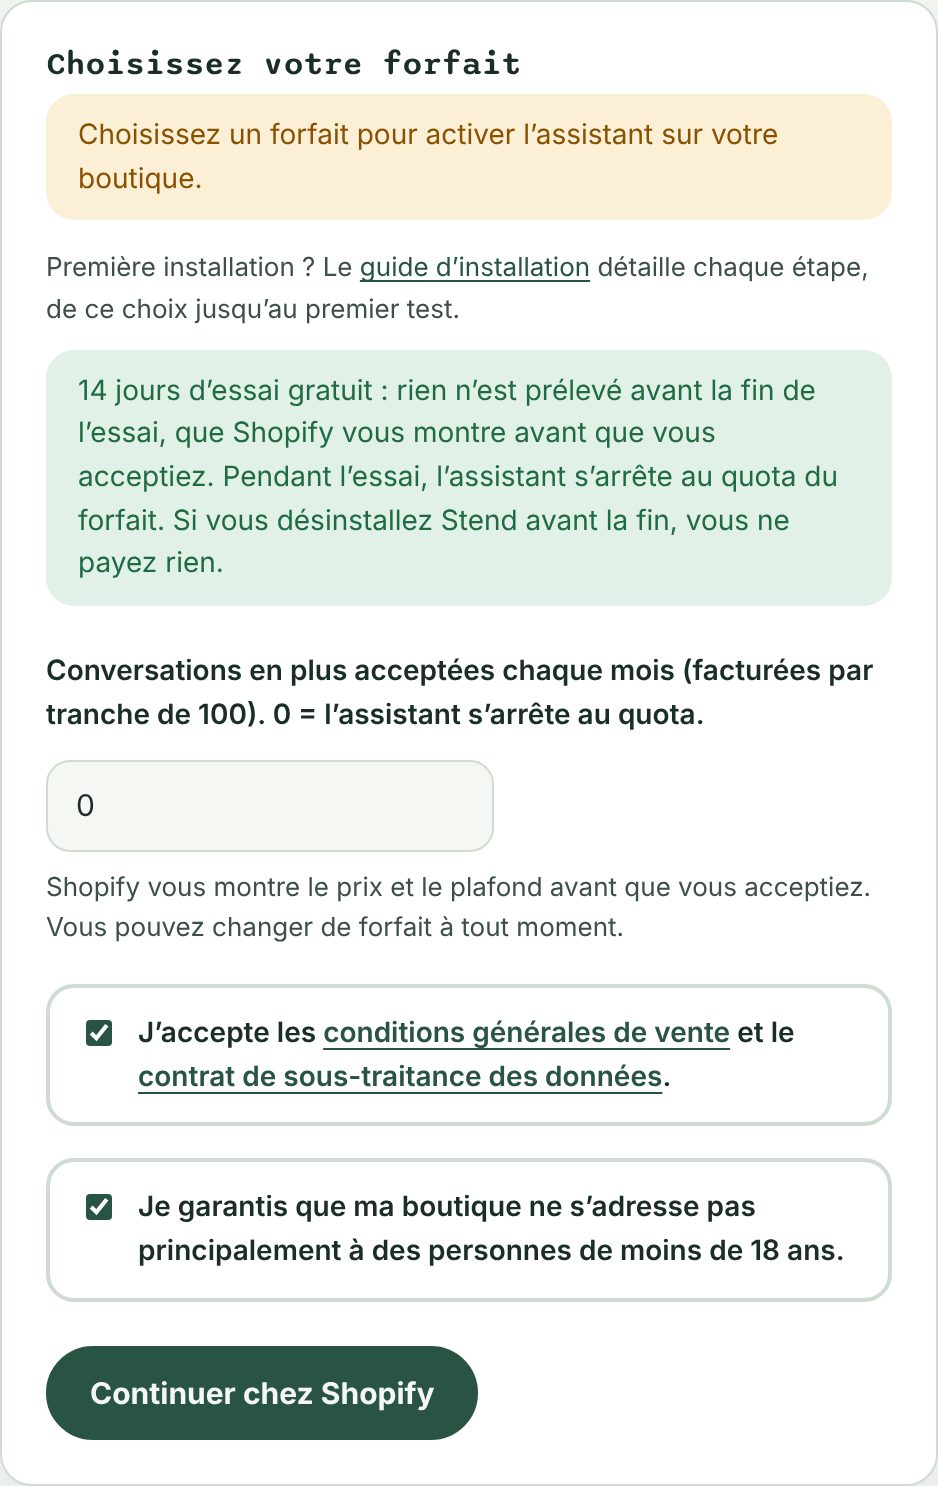
What you should see: back in Stend, the card shows "… plan active: the assistant is answering your customers". You can change plans at any time from the same card.
Step 3: check the connection to Shopify
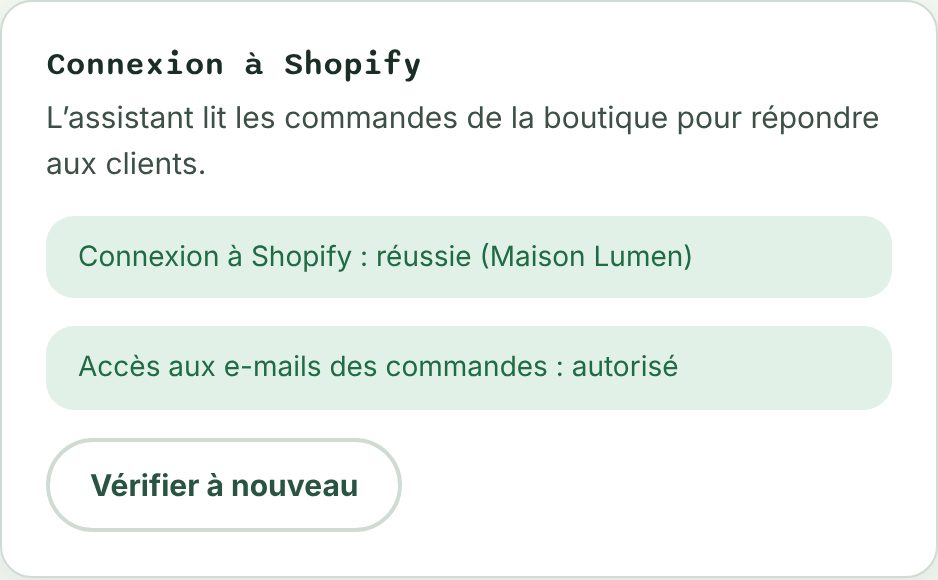
Still in the Overview, the Connection to Shopify card should show two green lines:
- "Connection to Shopify: working";
- "Access to order emails: allowed". This is what lets the assistant check that a customer really is the buyer of an order.
If a line is orange or red, click Check again. If it stays that way, write to us and copy the message shown.
Step 4: set the essentials
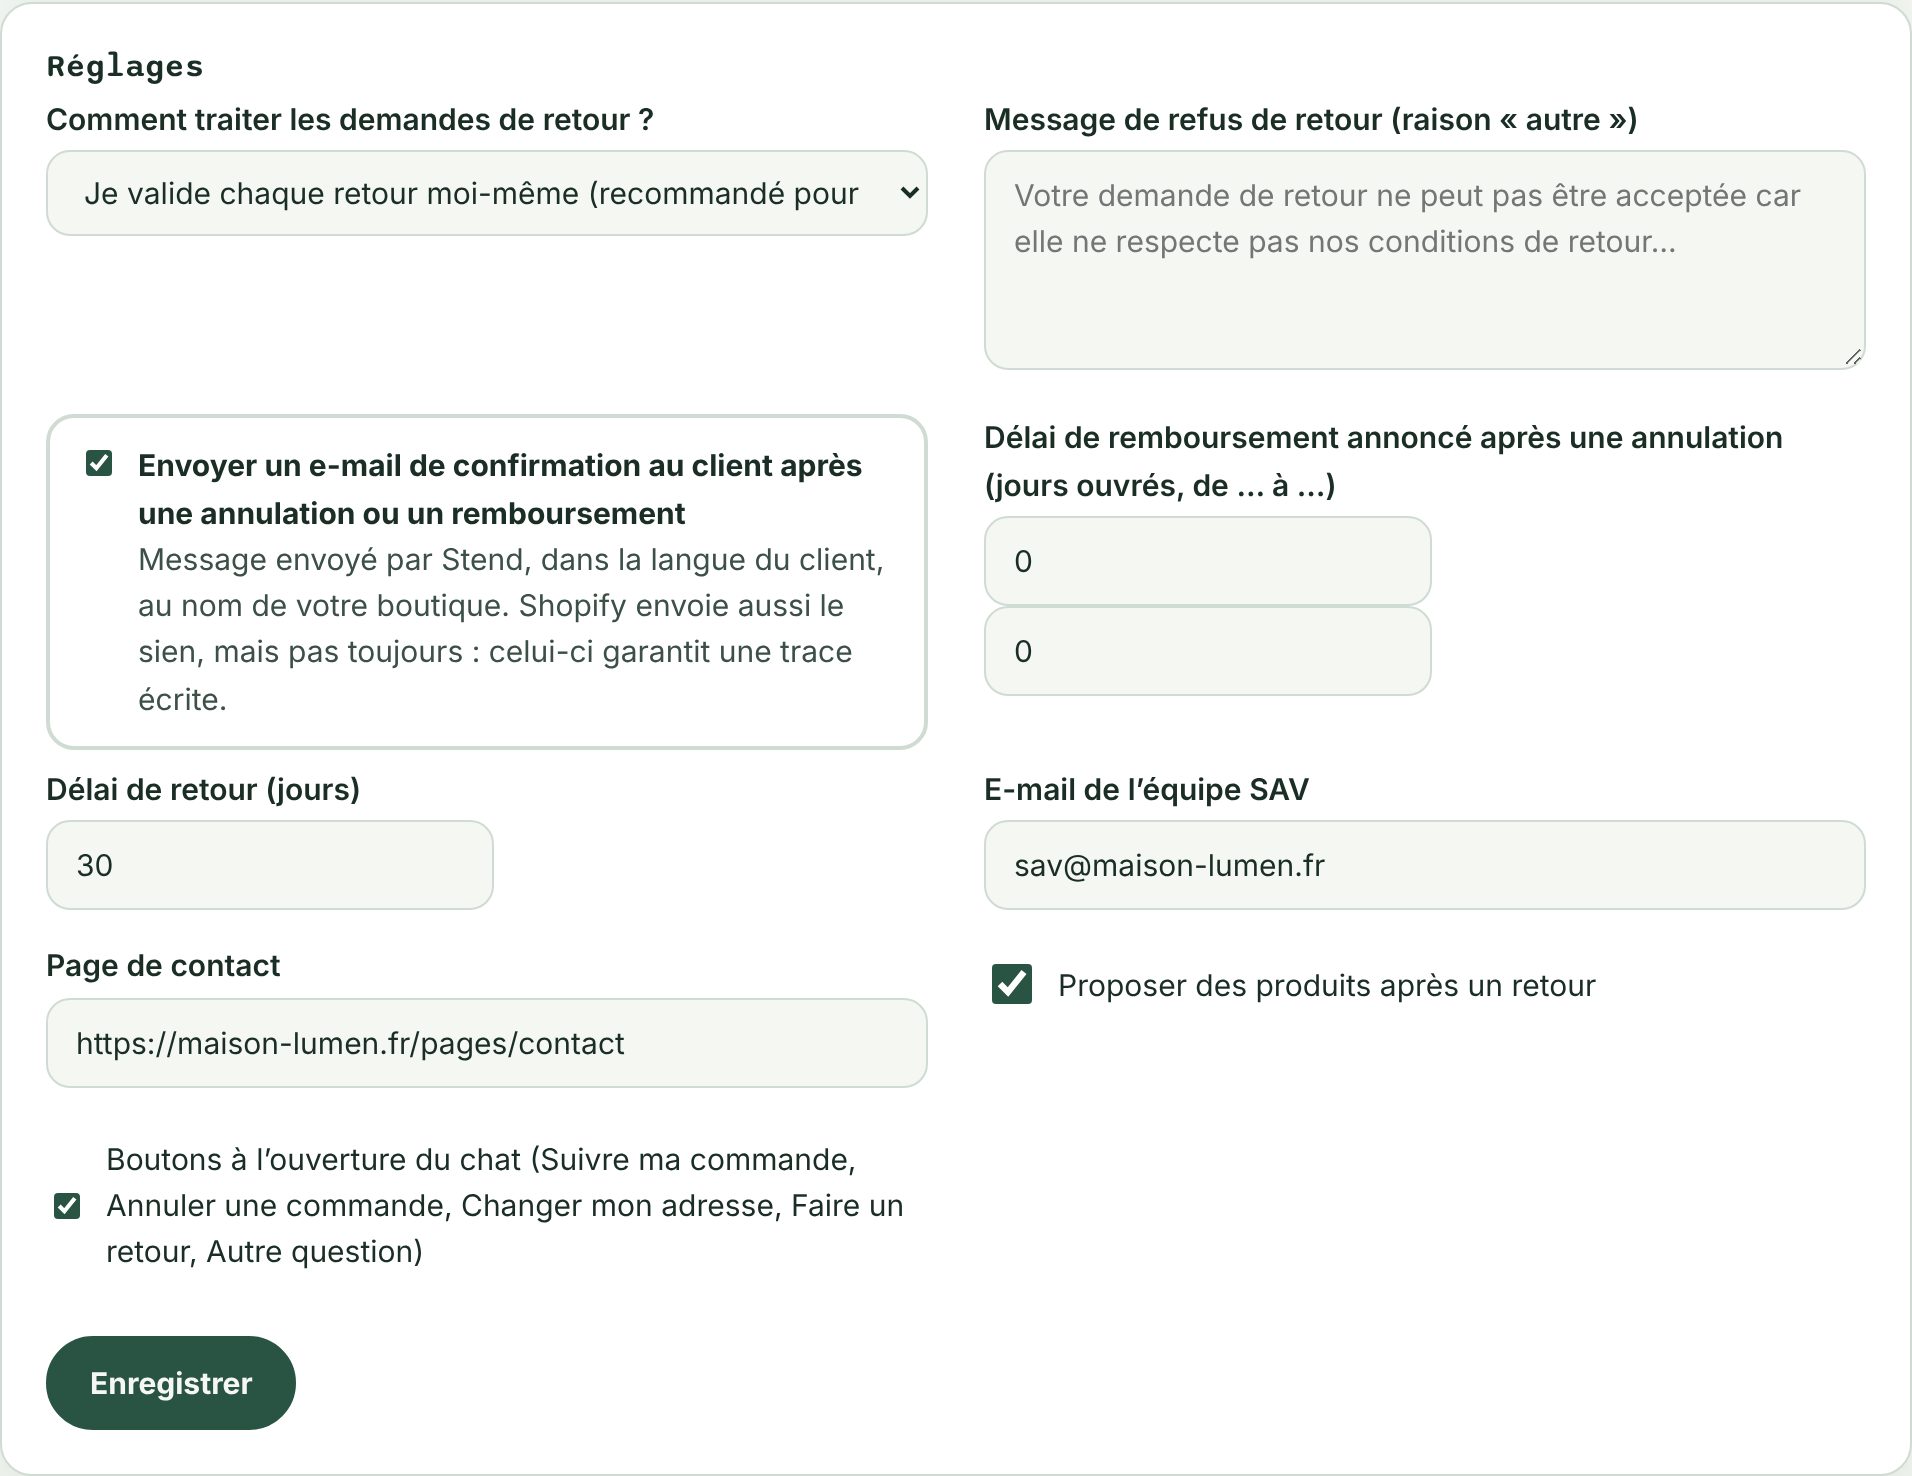
Open the Content tab. The default settings work, but these fields are specific to your store:
- Store FAQ: paste your information (shipping, payment, sizes, contact…). The assistant answers general questions only from this text and your Shopify policies, without making anything up. From the Pro plan, we can import this text from your website for you: ask us at contact@getstend.com.
- Support team email: the address that receives the cases. Each email gives the conversation number, with a link that opens it in your dashboard. Emails are sent in your dashboard's language.
- Contact page: where the assistant sends a customer when it can't help them itself.
- Return window (days): the one in your policy. For your consumer customers in the European Union, the law requires at least 14 days after delivery; the dashboard warns you if you enter less.
- Response time announced to the customer: how quickly your team replies. The assistant announces it to the customer as is, so choose a time you can keep.
- Return instructions: return address, costs, packaging. They're shown to the customer at the end of their return request.
- How should return requests be handled? To start with, keep "I approve each return myself": the assistant creates the request in Shopify and you approve or decline it. You can switch to automatic once you're confident.
Optional: specific return conditions (non-returnable items, required condition…), or a dedicated return portal if you already use a returns app. Click Save at the bottom of each card.
In the Modules tab, the What the assistant can do card lets you turn off a feature you don't want to offer, for example order cancellation. The assistant then directs the customer to your team.
Step 5: match the chat to your brand
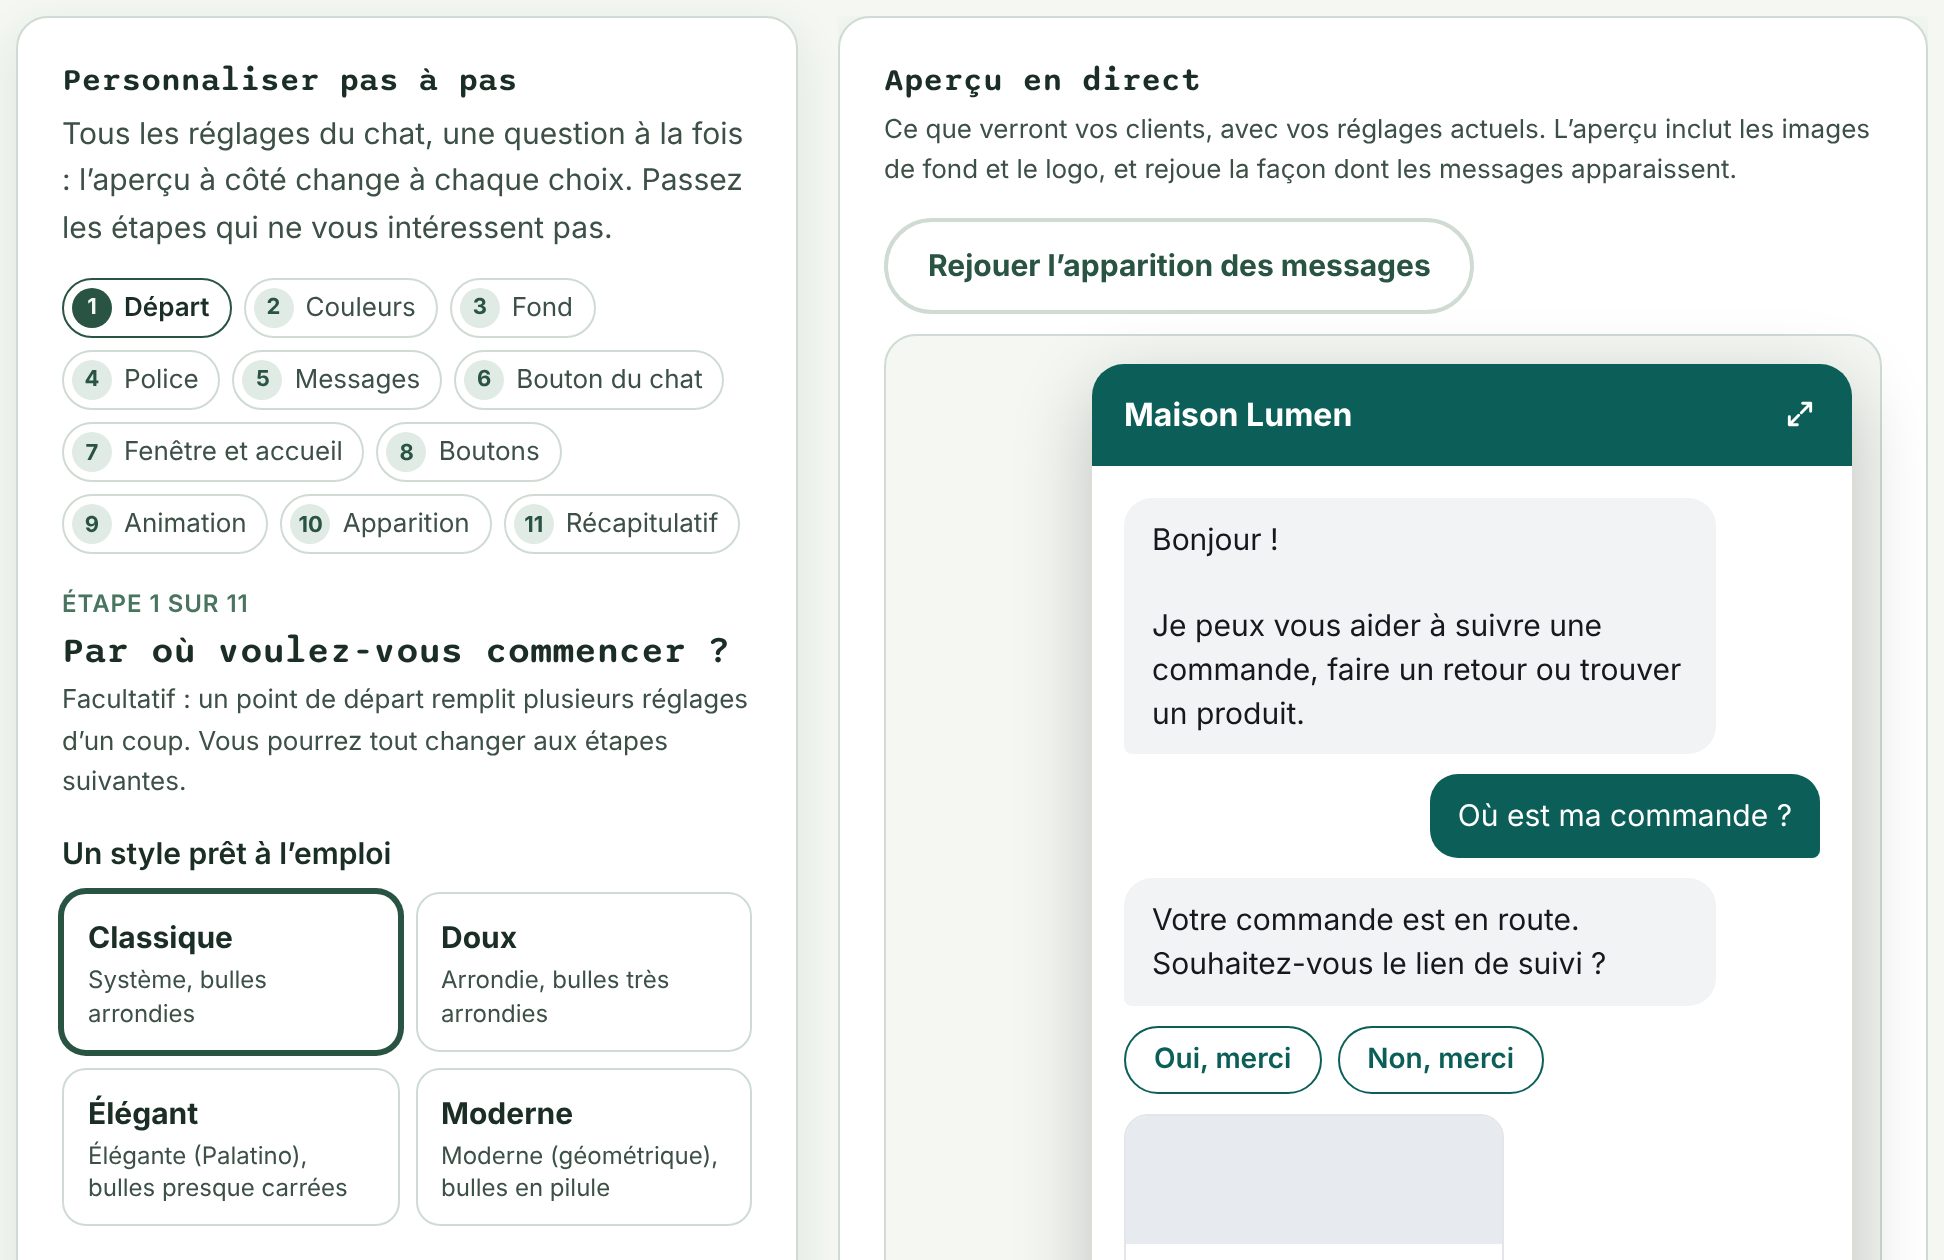
In the Appearance tab, the Customize step by step card asks you one question at a time: color, bubble shape, background, animation… The preview next to it changes with every choice. Skip the steps you don't care about. At a minimum, set your brand color: the rest can wait.
Step 6: show the chat on your store
No code to paste. In the Overview, the Show the chat on your store card has an Open the theme editor button that takes you straight to the right place. Otherwise:
- In Shopify: Online Store → Themes → Customize.
- On the left, open App embeds (the blocks icon).
- Turn on Assistant Stend, then click Save at the top right.
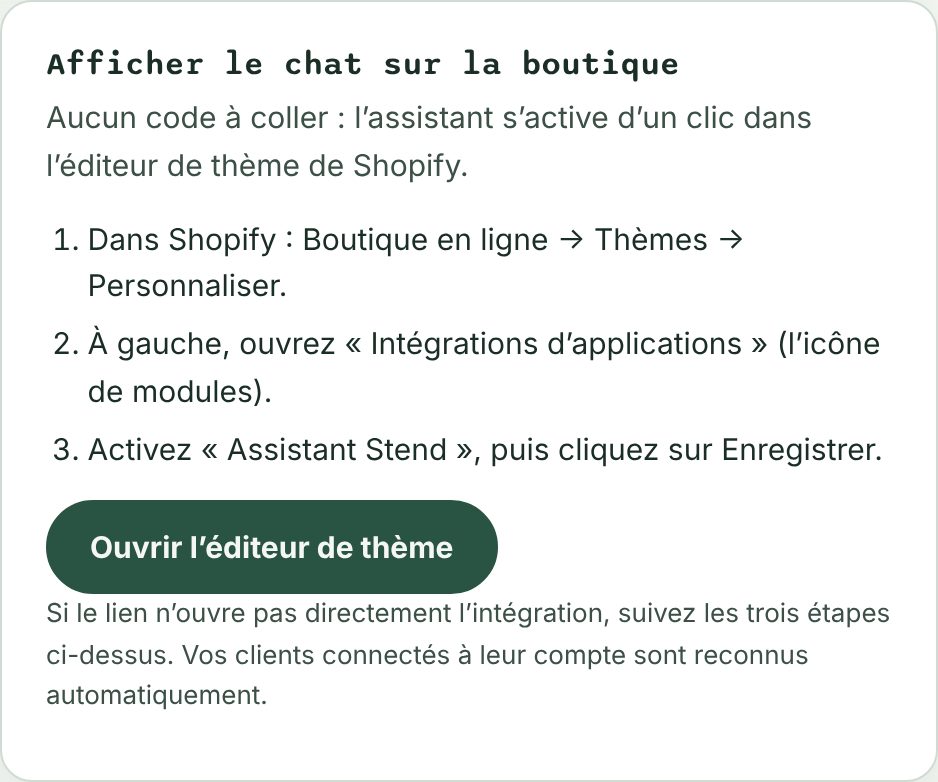
What you should see: the chat button at the bottom of every page of your store. Customers logged in to their account are recognized automatically: the assistant offers their latest orders without asking for their email again.
If you ever change themes, repeat this step on the new theme.
Step 7: test like a customer
Open your store in a private browsing window and click the chat button. Try:
- a question from your FAQ ("How much is shipping?"): the answer should use your information;
- tracking a real order, with its number and the email used to buy it: the assistant gives the status and the tracking link;
- a return request on a delivered order: it appears in Shopify and in Stend's Requests tab, where you can decline it afterwards;
- "I want to talk to someone": your team should get the email. If it doesn't arrive, check your spam folder.
Warning: don't try cancellation or an address change on a real customer's order. After confirmation, the action is really carried out in Shopify. Use a test order you placed yourself.
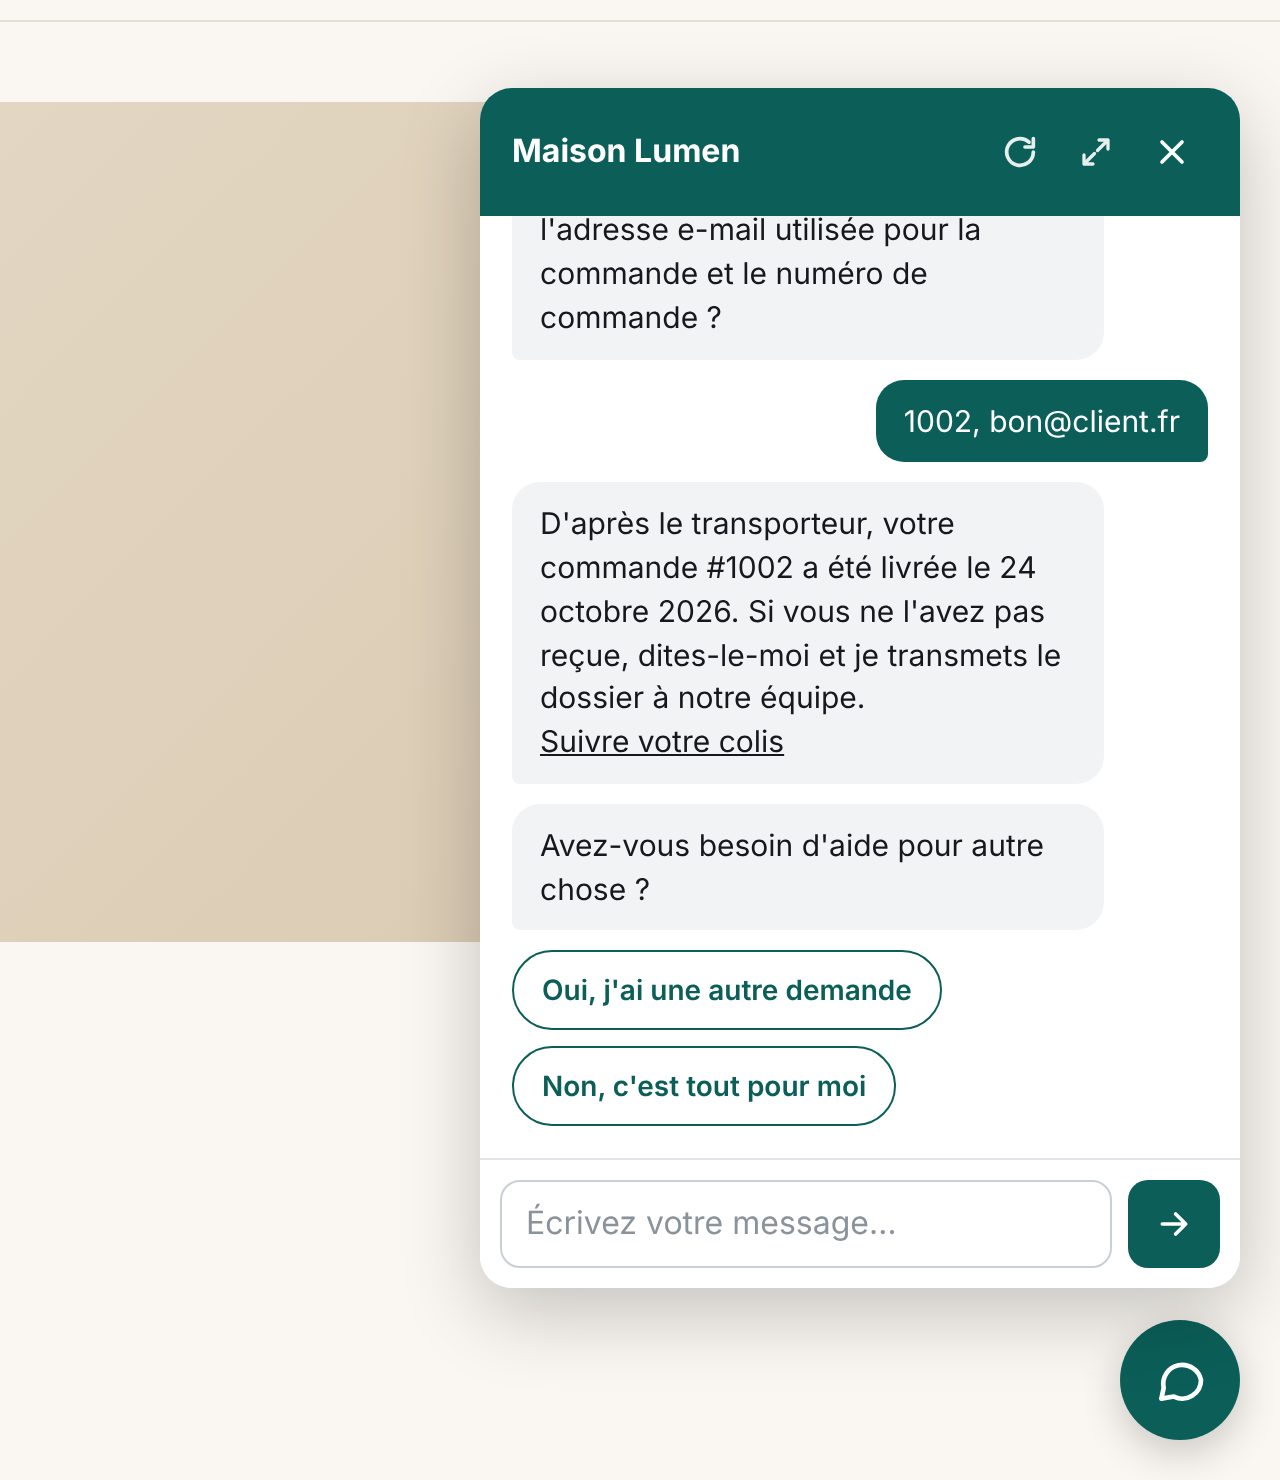
All your test conversations appear in the Conversations tab, each with its number.
Common problems
The chat button doesn't appear
Check that the "Assistant Stend" app embed is turned on and saved in the theme editor, on the published theme (not on a copy). Clear your browser cache or try in private browsing.
The assistant can't find an order
The customer must give the email used for the purchase: for security, the assistant shows nothing if the email doesn't match. If no order is ever found, check the "Access to order emails" line from step 3.
The assistant stopped answering
In the Overview, check that your plan is active (Your subscription card) and that the monthly quota hasn't been reached (This month's conversations card). To avoid stopping at the quota, raise the extra conversations allowed each month.
Your team doesn't get the emails
Check the address in Content → Support team email, then your spam folder. Add the sender to your contacts so the next ones land in your inbox.
Logged-in customers aren't recognized
Write to us: we'll give you a backup key to paste in the theme editor (App embeds → Assistant Stend → Widget key).
Next steps
- The Help button, at the bottom right of the dashboard, answers your questions about Stend at any time.
- The Statistics tab shows unanswered questions: add them to your FAQ as the weeks go by.
- All the detailed answers are in the FAQ.